Numerous technologies and tools have been developed as a result of the ever-expanding internet that is intended to make web creation and test automation less complicated. Headless Chrome is one of the most noteworthy tools in this area. This headless version of the popular Google Chrome browser works without a visible window and gives programmers and developers a superb way to interact with web information programmatically.
In this article, we will explore key topics concerning Headless Chrome, such as detecting the headless mode, taking screenshots of the browser window, working with userAgent, printing DOM, handling cookies, and running tests on Cloud Grid.
Streamline mobile app development across iOS, Android, Windows, and macOS with Visual Studio App Center. It’s an all-in-one platform that consolidates services like building, testing, distribution, monitoring, diagnostics, and more into a unified cloud solution. Plus, it simplifies the app upload process, reducing manual effort.
What is Headless Chrome?
The Google Chrome web browser has a headless (or non-graphical) variant called Headless Chrome or Chrome Headless. It was launched with Chrome 59. Running Chrome essentially without Chrome! It enables programmatic and automated usage of Chrome’s features without presenting a Graphical User Interface (GUI). It provides to the command line all of the contemporary web platform capabilities offered by Chromium and the Blink rendering engine.
Common Use Cases of Headless Chrome?
Headless Chrome is mostly used for data extraction, data scraping, software testing, and web automation. It ensures functioning and spots regressions. In automation testing, it serves a dual purpose: ensuring the correctness of operations and promptly identifying any regressions.
It also provides programmers with the means to engage in web scraping, effectively extracting data from websites. Simultaneously, it simplifies activities like form-filling and the generation of PDFs through web automation.
Cross browser testing is made easier by assisting developers to ensure browser compatibility. Remote access to Chrome DevTools allows for debugging. Apart from this, it is used by security experts to examine the security of web apps, and web performance. It is ideally suited for server-side and automated processes because it can carry out these functions without the need for a graphical user interface.
Different Versions of Headless Chrome
A new mode was added in Chrome version 96 along with the established — headless option. From versions 96 to 108, this fresh mode was known as — headless=chrome, and from versions 109 onwards, it was known as — headless=new. Users have complete access to all browser features in this mode, including the ability to use extensions. This improvement goes above and beyond what the standard headless mode can do, giving users and developers additional freedom to use Chrome’s robust features while operating in a headless environment.
Discover 31 Top Software Testing Tools in 2023 for powerful and efficient testing solutions.
Working of Chrome — headless=new Mode
Before we delve into understanding — — headless=new mode, it’s essential to grasp the working of — headless. From the implementation of Headless Chrome, it can easily be misinterpreted that the Headless Chrome and regular Chrome browser are the same. Interestingly, this was only partially true.
The codebase of Headless Chrome didn’t share any of the Chrome browser code located in //chrome. However, Headless mode introduced some unique bugs and features that are not found in regular Chrome. This sometimes creates a scenario where a test case is working correctly in one mode but fails in the other. It also slowed automation testing performance involving browser extensions or other browser-level functions without dedicated Headless support.

In 2021, the Chrome development team finally integrated the Headless and Headful modes in version 112. In this mode, Chrome starts but doesn’t display any platform windows. However, all existing functionalities and future updates are available with no restrictions.
How to Run Headless Chrome in Selenium?
In this section, we are going to cover the installation process for Chrome Headless.
There are a few prerequisites for using Headless Chrome:
The latest version of Python 3.
Chrome Browser.
Newer version of Selenium 4.
You can follow a detailed blog on Python Selenium On Chrome if you are facing difficulties in installing any of the prerequisites.
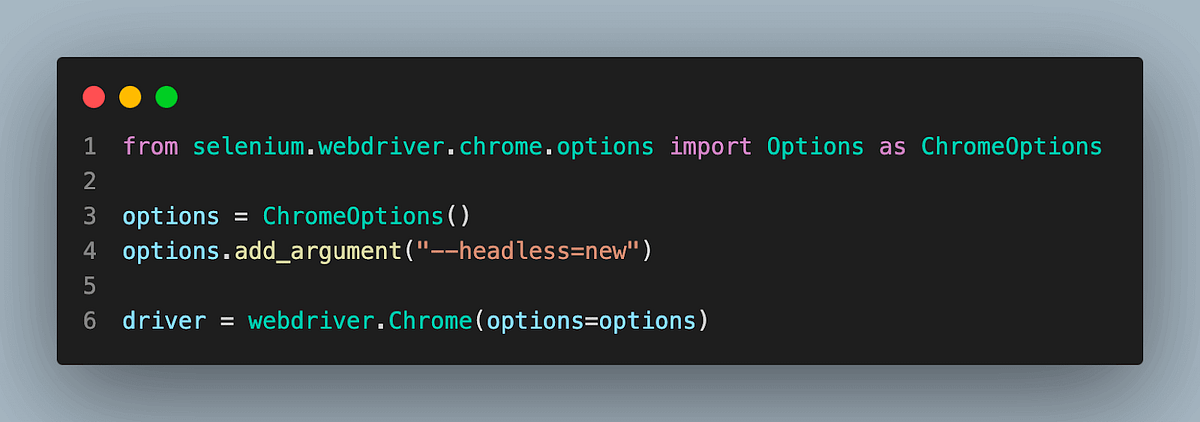
Headless Chrome is enabled using ChromeOptions().
Discover the game-changing power of 31 leading QA automation tools in 2023 — optimize your testing for unparalleled efficiency and effectiveness.
Basic Headless Chrome Techniques
This section covers some basic functionalities like detecting Headless Chrome, getting the title of the website, taking screenshots, and many more.
How to Detect Headless Chrome in Selenium
You can use userAgent to detect whether Chrome is running in Headless mode or not. A web browser or other client software transmits a userAgent string to a web server with each request to identify itself and its capabilities. The user agent string includes details that can be used to determine the client, such as the operating system, device type, and browser version.
The below code shows the use of userAgent for detection.
from selenium import webdriver
from selenium.webdriver.chrome.options import Options as ChromeOptions

options = ChromeOptions()
options.add_argument("--headless=new")

driver = webdriver.Chrome(options=options)

isHeadless = driver.execute_script("return navigator.userAgent;")
substr = "HeadlessChrome"

print(isHeadless)
if substr.lower() in isHeadless.lower():
    print("Headless Chrome detected")
else:
    print("Non-Headless Chrome detected")

driver.quit()
Console Output:

Getting the Title of the Website
The title of the website can be used to verify that the website is accessible to users and also verify that the website is loading the correct page.
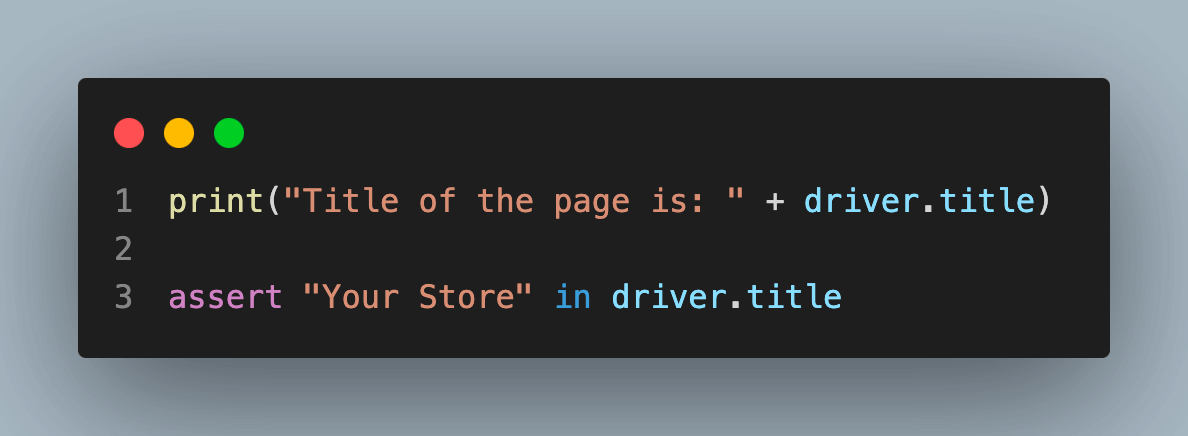
The below code shows how to get the title and check it using assertion.
from selenium import webdriver
from selenium.webdriver.chrome.options import Options as ChromeOptions

# Create a new ChromeOptions object.
options = ChromeOptions()

# Set the headless mode.
options.add_argument("--headless=new")

# Create a new ChromeDriver object, passing in the ChromeOptions object.
driver = webdriver.Chrome(options=options)

# Navigate to the desired website.
driver.get("https://ecommerce-playground.lambdatest.io/")

# Print the title of the page.
print("Title of the page is: " + driver.title)

# Assert that the title of the page contains the text "Your Store".
assert "Your Store" in driver.title

# Close the browser.
driver.quit()
Console Output:

The title method is used to get the title of the website. Assert is used for verifying or validating the website title. Learn How To Use Assert and Verify in Selenium WebDriver for accurate validation of website titles.
Taking a Screenshot of a Window
The screenshot ensures that while performing automation tests, we can have a visual record of the page’s state in case of any errors.
The below code shows how to use the save_screenshot() method.
from selenium import webdriver
from selenium.webdriver.chrome.options import Options as ChromeOptions

options = ChromeOptions()
options.add_argument("--headless=new")

driver = webdriver.Chrome(options=options)

driver.get("https://ecommerce-playground.lambdatest.io/")

# Save a screenshot of the current page to the file "screenshot.png".
driver.save_screenshot("screenshot.png")
driver.quit()
Taken Screenshot:
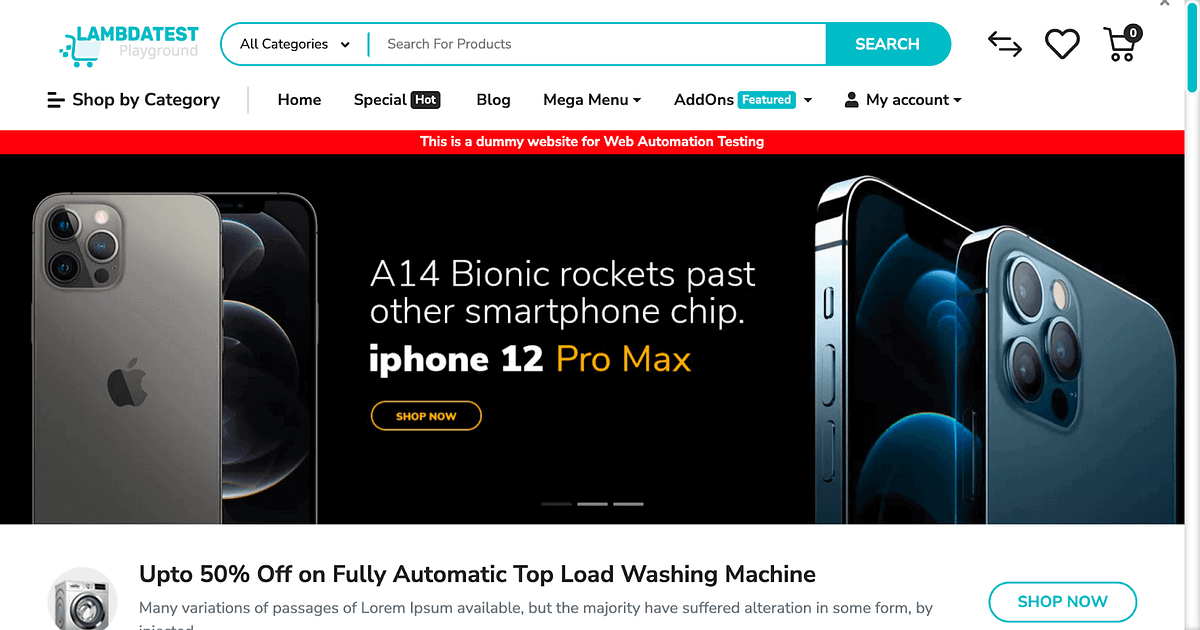
Selenium by default provides a method to record screenshots via the save_screenshot() method.

Advanced Headless Chrome Techniques
For developers, testers, and QAs, advanced techniques in Headless Chrome open up a world of customization possibilities. We’ll look at some of the methods in this section, like customizing userAgent, handling cookies, printing Document Object Model (DOM), generating PDFs, and working with ActionChains.
Customizing userAgent
Customizing the userAgent serves multiple purposes, such as debugging web applications, testing web applications across various browser environments, enabling web scraping without triggering anti-scraping measures, and accessing websites that may be restricted based on geographical location or device types.
from selenium import webdriver
from selenium.webdriver.chrome.options import Options as ChromeOptions

# Define your custom user agent
custom_user_agent = "Mozilla/5.0 (Macintosh; Intel Mac OS X 10_15_7) AppleWebKit/537.36 (KHTML, like Gecko) HeadlessChrome/116.0.0.0 Safari/537.36"

options = ChromeOptions()
options.add_argument("--headless=new")
options.add_argument(f"--user-agent={custom_user_agent}")  # Set custom user agent

driver = webdriver.Chrome(options=options)

user_agent = driver.execute_script("return navigator.userAgent;")
# Print the user agent string.
print(user_agent)
driver.quit()
Console Output:

This guide offers a complete overview of the various web automation tools available and how to choose the right tool for your specific testing needs.
Handling Authentication and Cookies
While performing web testing, it becomes crucial to handle and use cookies related to authentication or maintaining session data. Selenium provides various functions like add_cookie(), get_cookie(), get_cookies() and delete_cookie() to work with cookies.
from selenium import webdriver
from selenium.webdriver.chrome.options import Options as ChromeOptions

options = ChromeOptions()
options.add_argument("--headless=new")
driver = webdriver.Chrome(options=options)

driver.get("https://ecommerce-playground.lambdatest.io/")

driver.add_cookie({"name": "rohan", "value": "user1234"})
print(driver.get_cookie("rohan"))
driver.quit()
Console Output:

Capturing Screenshots
Taking snapshots of different HTML elements like div, span, a, and many more while performing tests helps to figure out issues related to UI and rendering data.
from selenium import webdriver
from selenium.webdriver.chrome.options import Options as ChromeOptions

options = ChromeOptions()
options.add_argument("--headless=new")
driver = webdriver.Chrome(options=options)

driver.get("https://ecommerce-playground.lambdatest.io/")

element = driver.find_element(By.XPATH,'//*[@id="mz-carousel-213240"]/div/div[1]/a/img')

element.screenshot('screenshot.png')

driver.quit()
Taken Screenshot:

Printing the DOM
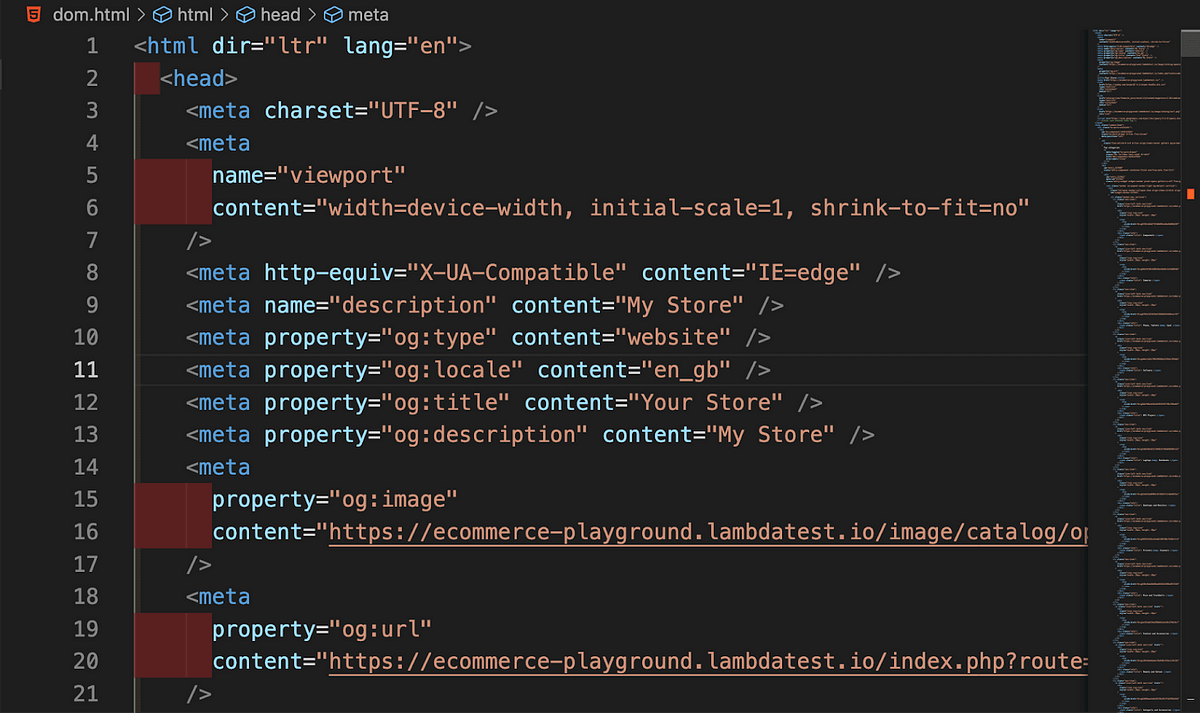
Printing Document Object Model (DOM) helps evaluate a web page’s structure, which is essential for debugging and guaranteeing data consistency. You can inspect the page’s structure and spot any irregularities in the data retrieving process by printing the DOM.
from selenium import webdriver
from selenium.webdriver.chrome.options import Options as ChromeOptions
from selenium.webdriver.common.by import By
import time
options = ChromeOptions()
options.add_argument("--headless=new")
driver = webdriver.Chrome(options=options)

driver.get("https://ecommerce-playground.lambdatest.io/")

print(driver.page_source)

# or

html = driver.execute_script("return document.documentElement.outerHTML;")

# Save the DOM to a file.
with open("dom.html", "w") as f:
    f.write(html)
driver.quit()
Console Output:

File Output:
Looking to manage your tests more efficiently? In this blog, explore a variety of test management tools and select the one that suits your team’s needs.
Generating PDFs
Generating PDFs is a handy method for archiving web content and verifying that web pages are printable. There are various ways to generate a PDF:
Using the Selenium print_page() method:
The print_page() prints the current page within the browser. Read more about it from the official docs of selenium.
from selenium import webdriver
from selenium.webdriver.chrome.options import Options as ChromeOptions
from selenium.webdriver.common.print_page_options import PrintOptions
import base64
print_options = PrintOptions()
print_options.page_ranges = ['1-2']

options = ChromeOptions()
options.add_argument('--headless=new')

driver = webdriver.Chrome(options=options)
driver.get("https://ecommerce-playground.lambdatest.io/")

base64code = driver.print_page(print_options)
# decode the base64 string to bytes
pdf_bytes = base64.b64decode(base64code)

# write the bytes to a file with a .pdf extension
with open('output.pdf', 'wb') as f:
    f.write(pdf_bytes)
driver.quit()
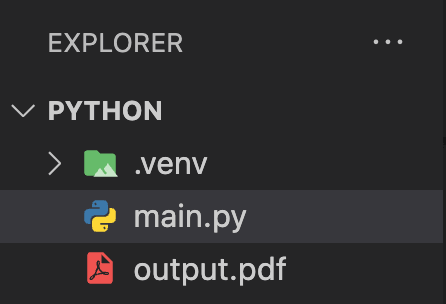
Console Output:
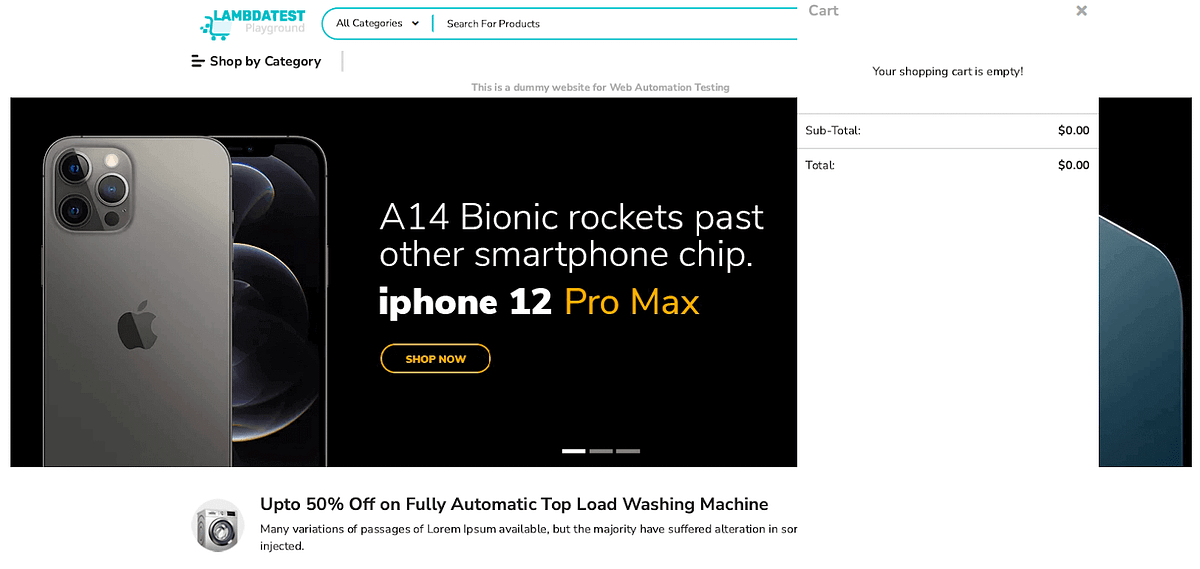
Using Chrome DevTools Protocols:
Chrome DevTools Protocols (CDP commands) allow you to interact with and control Google Chrome or Chromium-based browsers programmatically. You can use CDP commands to perform various tasks, such as navigating to web pages, inspecting the DOM, capturing screenshots, and more. Here’s an overview of how to use CDP commands with the help of the execute_cdp_cmd() method provided by Selenium:
from selenium import webdriver
from selenium.webdriver.chrome.options import Options as ChromeOptions
import base64


options = ChromeOptions()
options.add_argument('--headless=new')

driver = webdriver.Chrome(options=options)
driver.get("https://ecommerce-playground.lambdatest.io/")

# Execute the CDP command to print the page to PDF.
pdf_data = driver.execute_cdp_cmd("Page.printToPDF", {"path": 'html-page.pdf', "format": 'A4'})

# Decode the PDF data and write it to a file.
with open('cdp_output.pdf', 'wb') as f:
    f.write(base64.b64decode(pdf_data['data']))

driver.quit()
Taken Screenshot:
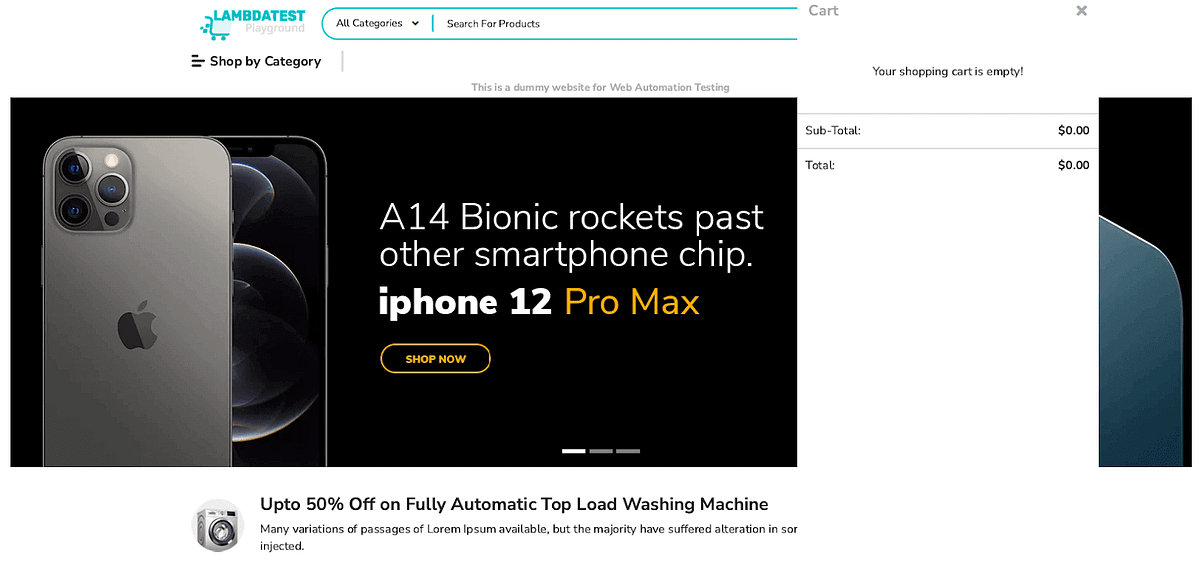
Capture, Create, and Recreate Actions
Automating user interactions with Headless Chrome allows you to create end-to-end test scripts, replicating real user behavior.
Capture: Use ActionChains to record user actions like mouse movements and clicks; call the perform() method to execute them.
Create: Make a new ActionChains object, add user actions, and call the perform() method to execute them.
Recreate: To repeat captured user actions, create new ActionChains, add recorded actions, and call perform().
from selenium import webdriver
from selenium.webdriver.chrome.options import Options as ChromeOptions
from selenium.webdriver.common.by import By
from selenium.webdriver.common.action_chains import ActionChains

options = ChromeOptions()
options.add_argument('--headless=new')

driver = webdriver.Chrome(options=options)

driver.get("https://ecommerce-playground.lambdatest.io/")

# Set the window size to 1200x760
driver.set_window_size(1200, 760)

# Find the element to interact with
element = driver.find_element(By.CSS_SELECTOR, ".active > .d-block > .d-block")

# Create a new ActionChains object
actions = ActionChains(driver)

# Move the mouse to the element and click and hold
actions.move_to_element(element).click_and_hold().perform()

driver.save_screenshot('action1.png')

# Release the mouse click
actions.move_to_element(element).release().perform()

# Click on the dropdown toggle
driver.find_element(By.CSS_SELECTOR, ".dropdown-toggle > .info:nth-child(2) > .title").click()

driver.save_screenshot('action2.png')

driver.quit()
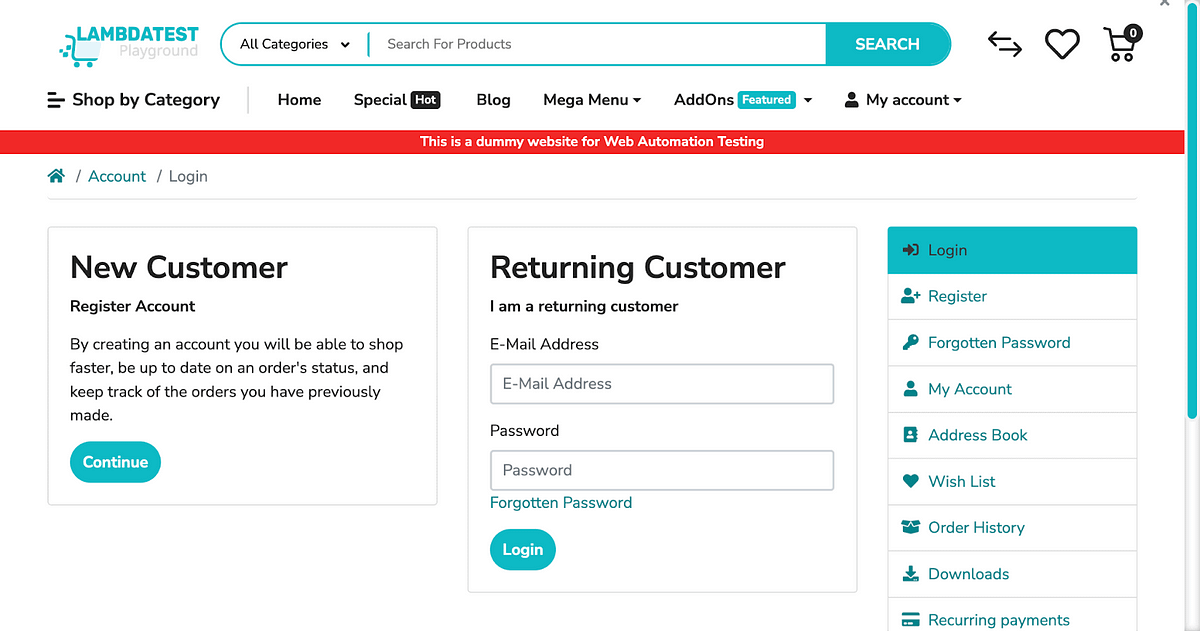
Action1 Image Output:
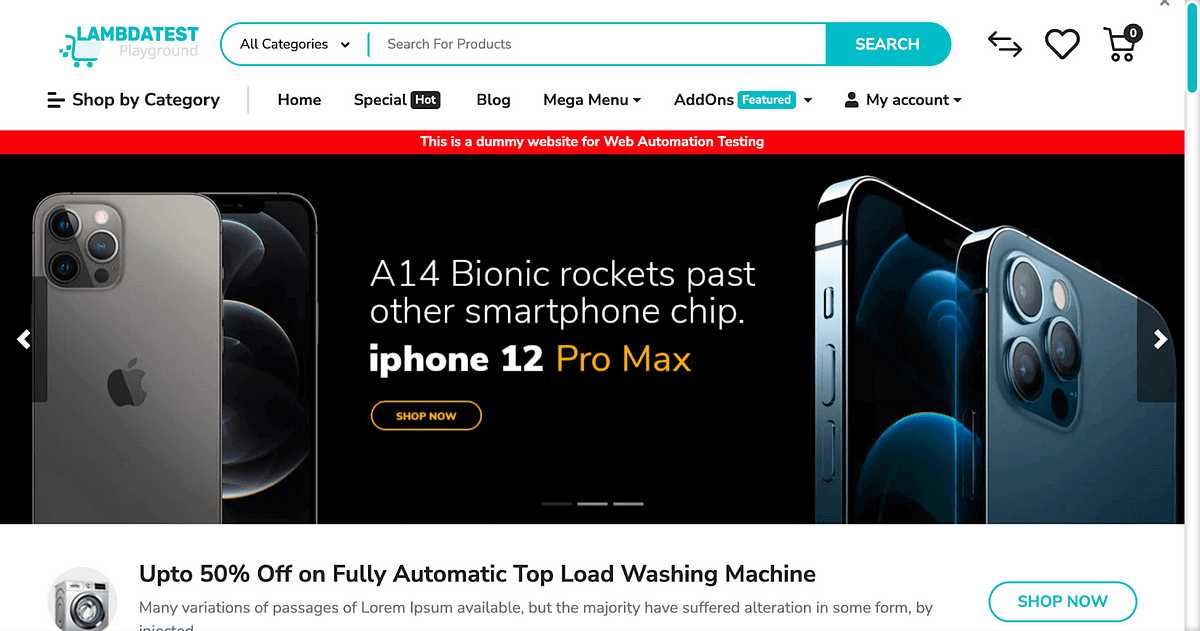
Action 2 Image Output:
Retrieving Performance Logs from Chrome Headless
It can be retrieved using execute_cdp_cmd() in Selenium. Performance logs are essential because they provide information about how a web application is being used, and help locate and fix performance issues, resulting in faster loading of web applications and ultimately better user experiences.
from selenium import webdriver
from selenium.webdriver.chrome.options import Options as ChromeOptions

options = ChromeOptions()
options.add_argument('--headless=new')

driver = webdriver.Chrome(options=options)
driver.get("https://ecommerce-playground.lambdatest.io/")

driver.execute_cdp_cmd('Performance.enable', {})
t = driver.execute_cdp_cmd('Performance.getMetrics', {})
print(t)

driver.quit()
Console Output:

How to Debug in Headless Chrome?
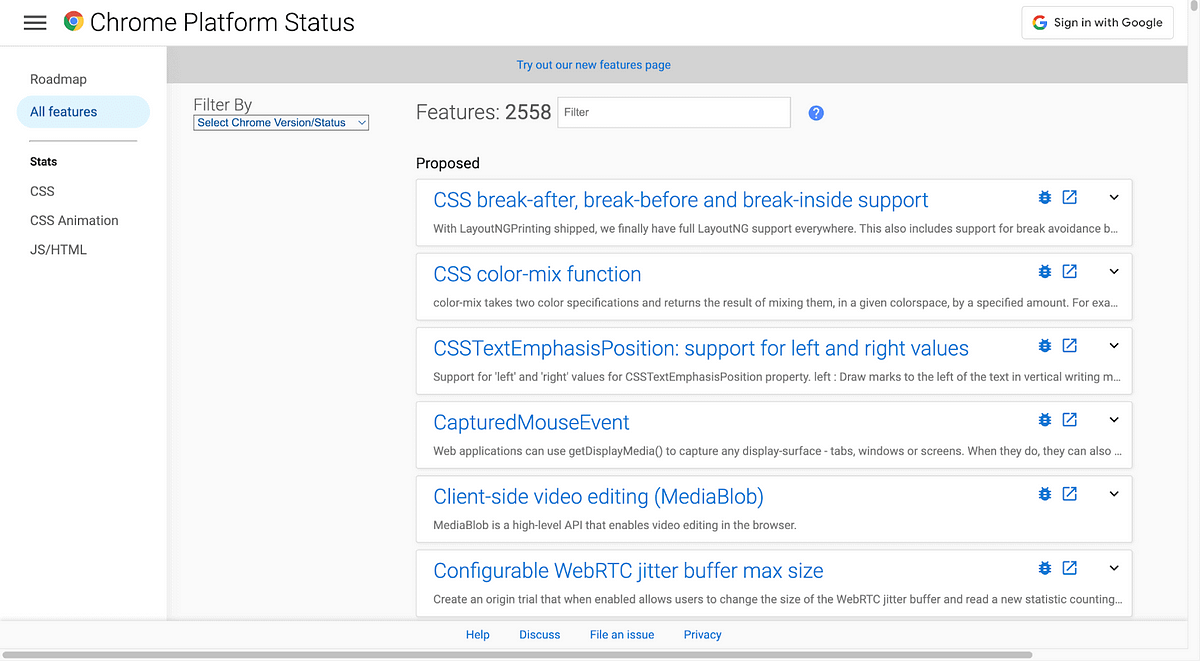
The DevTools protocol is activated when Chrome is run with the — remote-debugging-port=9222 option. DevTools protocol allows Chrome and the headless browser to communicate with one another. Tools like Sublime, Visual Studio Code, and Node.js also use this protocol for remote debugging.
Since there isn’t a visible browser window in headless mode, you may see if it’s functioning by using another web browser and going to localhost:9222. This will provide a list of pages that you may examine to see how the headless browser renders different pages.
You can analyze, debug, and modify the web page using the same DevTools interface seen on this page, just as you would with a standard browser. This website also functions as a helpful debugging tool for viewing all the underlying commands that the DevTools protocol is delivering to the browser if you’re utilizing headless mode in your code.
Using Headless Chrome on Cloud Grid
When it comes to running a series of test scripts to guarantee website compatibility across multiple versions of Chrome, a problem arises. In our current environment, where Chrome version 118 is the only version available, the implementation of test scripts for Chrome version 114 would lead to code errors. This is where the use of Cloud Grid comes into play.
A cloud grid gives users access to various real and virtual machines, each with its configuration, operating system, and web browser. This guarantees accurate testing in various situations, an essential component of reliable software development. Additionally, Cloud providers typically offer high availability and redundancy, reducing the likelihood of downtime during testing.
LambdaTest is a Selenium based cloud Grid and cross browser testing platform for web and mobile applications. It supports tests across 3000+ combinations of browsers, real devices, and OS to offer cross-browser compatibility. This empowers you to establish testing procedures that not only meet your specific requirements but also expand in scale as your project evolves.
In this section, we will run a test on LambdaTest. We will run our test on the macOS Sonoma operating system with Chrome version 118.0.
Before Running a Python test on LambdaTest, follow the simple steps:
Create an account on LambdaTest and complete all the required processes.
Go to the dashboard by clicking the dashboard button on the top right corner or Follow this LambdaTest Dashboard.
Get your credentials from the profile icon located in the top right corner, and then select the profile option it will redirect to the profile screen. Select Password & Security here; you can find your Username and Access Key and save it for future use. Or use this Profile link.
The below test uses the same code as the Capture, Create, and Recreate Actions section.
from selenium import webdriver
from selenium.webdriver.chrome.options import Options as ChromeOptions
from selenium.webdriver.common.by import By
from selenium.webdriver.common.action_chains import ActionChains

username = "username"
access_key = "access_key"


# Capabilities define the OS, Browser name, and other necessary details
lt_options = {
    "user": username,
    "accessKey": access_key,
    "build": "Build for Headless Chrome",
    "name": "Test 1",
    "platformName": "macOS Sonoma",
    "headless": True, # Headless Chrome
    "video": True,
    "w3c": True,
    "browserName": "Chrome",
    "browserVersion": "118.0",
}

def test_for_headless_on_cloud_gird():
    # To run the test on the platform
    remote_url = "@hub.lambdatest.com/wd/hub">http://{}:{}@hub.lambdatest.com/wd/hub".format(username, access_key)
    browser_options = ChromeOptions()

    # Adding the capability to the chrome
    browser_options.set_capability('LT:Options', lt_options)

    driver = webdriver.Remote(command_executor=remote_url, options=browser_options)
    driver.get("https://ecommerce-playground.lambdatest.io/")

    element = driver.find_element(By.CSS_SELECTOR, ".active > .d-block > .d-block")

    actions = ActionChains(driver)

    actions.move_to_element(element).click_and_hold().perform()

    actions.move_to_element(element).release().perform()

    driver.find_element(By.CSS_SELECTOR, ".dropdown-toggle > .info:nth-child(2) > .title").click()

    driver.quit()

if __name__ == "__main__":
    test_for_headless_on_cloud_gird()
Understanding the code step by step:
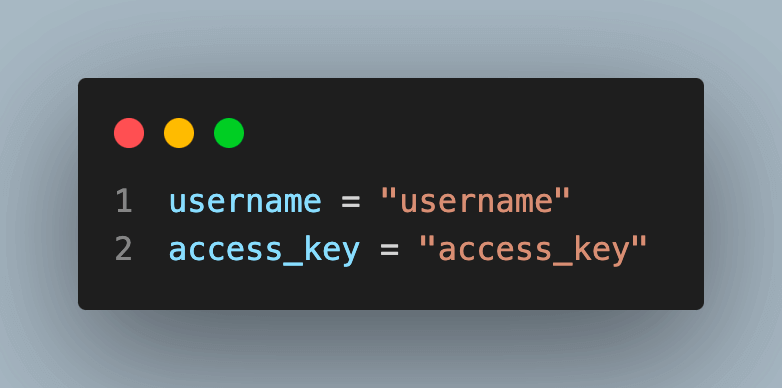
Add your credentials here as it will help the lambdaTest to run tests on your account:
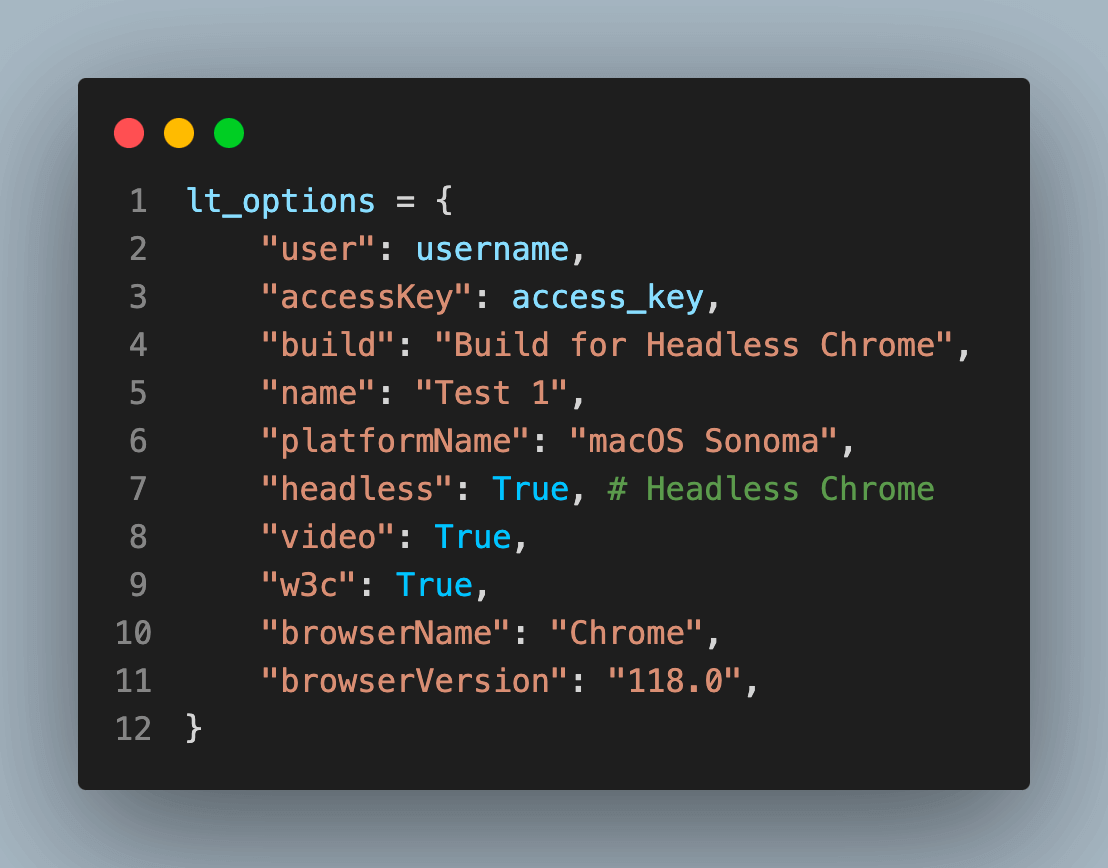
Get your desired capabilities that can be generated from the capabilities generator.
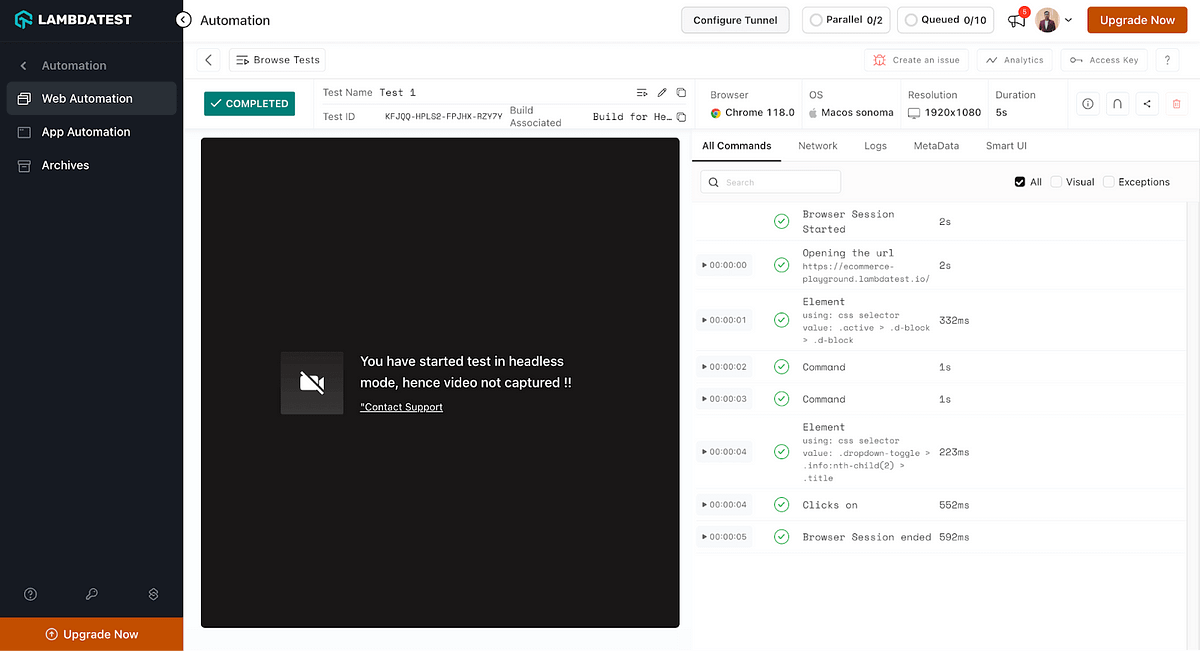
Find details of your test case under Automation>Builds click on the First test to get details of the implementation.
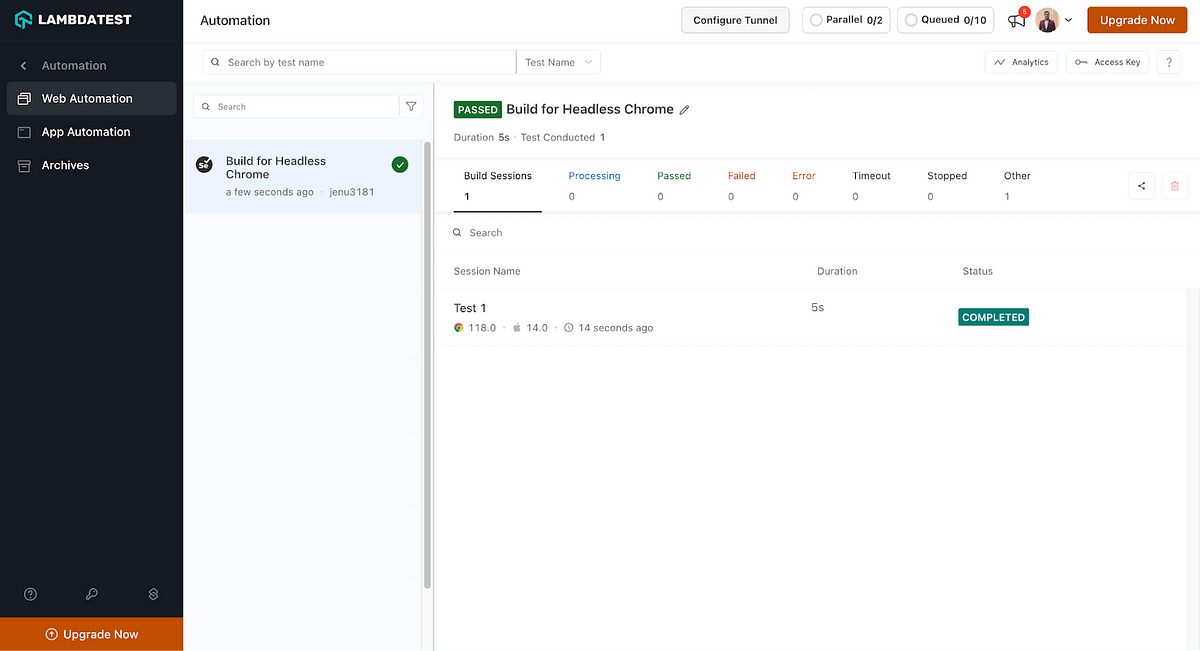
Explore various available test details to get a better idea of the platform.
In this tutorial, learn what is Regression testing, its importance, types, and how to perform it.
Conclusion
Headless Chrome is a powerful instrument for web scraping and automation testing. It comes in a variety of configurations that are tailored to different use cases, and Selenium integration is like the cherry on the cake.
Essential functionalities are provided by simple methods, including detecting Headless Chrome, getting web page title, and taking screenshots. Customizing userAgent, managing cookies for authentication or managing sessions, generating website PDFs, and obtaining performance logs all present a multitude of opportunities for more complex use cases in test automation.
Headless Chrome may simplify your workflows and assist you in achieving your objectives, regardless of whether you are a Developer, Tester, or QA. When successfully utilized, its adaptability and capabilities can greatly improve your web automation initiatives.
Frequently Asked Questions (FAQs)
Why to use Headless Chrome?
Headless Chrome is lightweight, it uses fewer resources, making it perfect for server-side operations.
How to detect Headless Chrome?
One common method to identify Headless Chrome is by examining its userAgent string. Headless Chrome userAgent strings typically include the word “Headless” and may also mention the Chrome version. For example HeadlessChrome/XXX.0.0.0.
How to run Chrome Headless in Selenium?
You just need two things installed on your machine Chrome browser and Selenium WebDriver. After that you use the headless chrome by the “–headless=new” as an argument in chrome options.
How fast is Chrome Headless?
Since it doesn’t have to show the content visually, Chrome Headless is often 1.5x to 2x faster than a standard, real Chrome browser. However, speed can vary according to the unique use case and the effectiveness of the scripts or tools being used with Chrome Headless.
Does Headless Chrome use regular browser cookies?
Yes, just like Chrome’s standard version, Headless Chrome uses conventional browser cookies. This enables a flawless browsing experience while using automated scripts or performing web testing because when you interact with a website using Headless Chrome, it may save and transfer cookies to retain your session and user-specific data.
